How to Create Generative Art NFTs
Using p5.js and Pinata

Outside the normal pictures and video, there are entire worlds that are possible by combining NFTs, HTML and web content. Like our CEO Kyle has said before, “If you can upload it to Pinata, you can make it an NFT.” Nothing is more dynamic than web content, as it could be a website, an interactive 3D model, a music app, or in this case, art generated by code.
In this tutorial we’ll show you how to code a simple art piece using p5.js, upload it to Pinata, and then mint it as an NFT. Continue reading the blog or check out the video below!
Coding the Art with p5.js
Since this is going to involve coding, we’ll need a text editor. You can use whatever text editor you’d like such as VSCode or Sublime, but for this tutorial we’ll use Replit. The nice thing about Replit is that it will setup a full blown template for html css and js, as well as a side by side preview of your project. To get started, visit Replit.com and create a free account.
Once you’re registered and in the app, click “Create Repl” in the top right.

From there you can select the “HTMl, CSS, JS” template and give it a name.

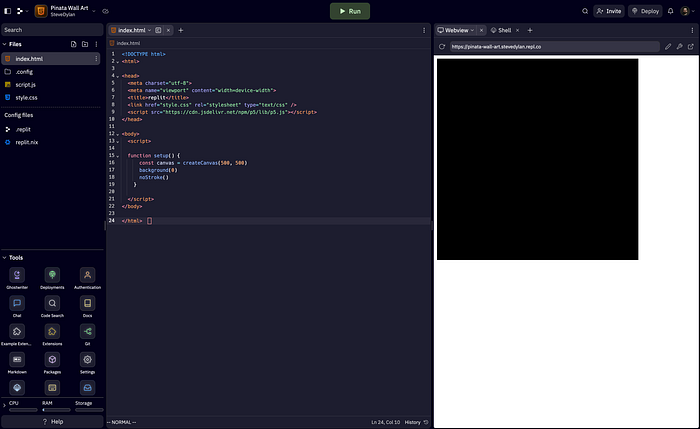
Once it’s done loading it should look like this and be ready to go.

To create our generative art NFT, we’re going to use a library called p5.js that makes it easy to create a canvas and then fill it with whatever you want. Be sure to check out their docs for a more detailed outlining of what is possible. To use it in our HTML, you will want to use their import script by pasting the line below into the <head> tags.
<script src="https://cdn.jsdelivr.net/npm/p5/lib/p5.js"></script>If you did it right and cleared out some of the other boiler template, your index.html file should look like this. You can see in the <body> tag that we have a set of <script> tags where all of our p5.js code will go.
<!DOCTYPE html>
<html>

<head>
  <meta charset="utf-8">
  <meta name="viewport" content="width=device-width">
  <title>replit</title>
  <link href="style.css" rel="stylesheet" type="text/css" />
  <script src="https://cdn.jsdelivr.net/npm/p5/lib/p5.js"></script>
</head>

<body>

  <script>

  // All our p5.js code will go here!

  </script>
</body>

</html>
To get started with p5.js script, we’re going to write a setup function that will create a 500px by 500px canvas with a black background (just so we can see it).
function setup() {
  const canvas = createCanvas(500, 500);
  background(0);
  noStroke();
}
If you save the file by clicking cmd + s or ctrl + s on windows, you should see the right side update with our canvas.
Now we’re going to draw some circles with another function called draw(). What’s really cool about p5.js is the ability to use a lot of math and logic to create our art and make things different every time.
For instance, we’re going to use random() to create a random position on the canvas, and we’ll make the height and width random too. I’ve made the ranges of height and width anywhere between 10 and 50, but you can adjust this to fit your needs. I also removed our black background and made the color of the circles black. At the bottom you’ll see the ellipse() function which takes the x and y position, and the height and width.
After saving this you should see a bunch of random circles starting to pop up everywhere on your canvas.
function setup() {
  const canvas = createCanvas(500, 500);
  noStroke();
}

function draw() {
  const x = random(width);
  const y = random(height);
  const size = random(10, 50);

  fill(0);

  ellipse(x, y, size, size);
}
While black on white can be considered classic, I want to add in some colors. I’ve gathered a palette of four colors, and I’m going to have the color fill be random for each circle. We do this by declaring our color palette as an array in the beginning, then by using a random index of the array we can select a color to use for each circle made.
const colors = ["#6A58F6", "#5CC996", "#DD7EF8", "#F19E38"];

function setup() {
  const canvas = createCanvas(500, 500);
  noStroke();
}

function draw() {
  const x = random(width);
  const y = random(height);
  const size = random(10, 50);

  const colorIndex = floor(random(colors.length));
  const color = colors[colorIndex];

  fill(color);

  ellipse(x, y, size, size);
}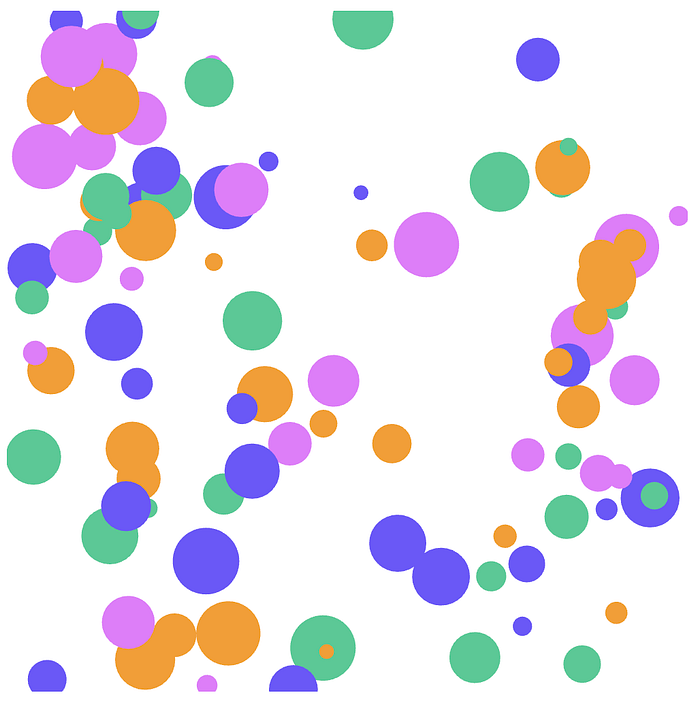
It’s getting there, but one thing that’s not desirable is eventually the canvas becomes full of circles and gets too busy.
To change this up, we’re going to add in a for loop into the generation of the circles. In the loop we’ll set a limit of how many circles are made, which is currently set to 50 but you can adjust this to your liking. One more thing I added to our setup is a frameRate() to prevent the for loop going too fast.
Right now it will show 1 frame per second, and you could increase this to be faster or reduce it to be slower.
const colors = ["#6A58F6", "#5CC996", "#DD7EF8", "#F19E38"];

function setup() {
  const canvas = createCanvas(500, 500);
  noStroke();
  frameRate(1);
}

function draw() {
  background(255);

  for (let i = 0; i < 50; i++) {
    const x = random(width);
    const y = random(height);
    const size = random(10, 50);

    const colorIndex = floor(random(colors.length));
    const color = colors[colorIndex];

    fill(color);

    ellipse(x, y, size, size);
  }
}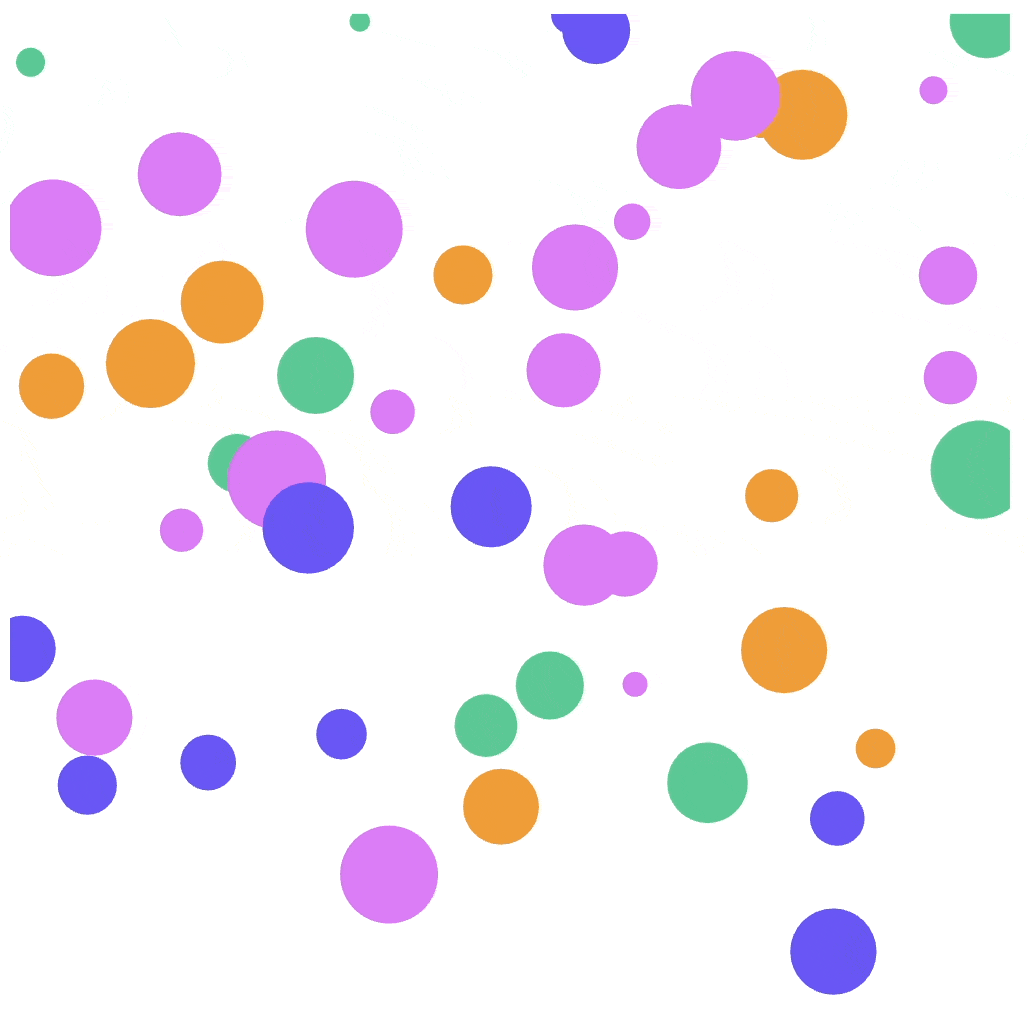
One last little bonus function you can add at the end: save the current frame of the artwork to your computer by clicking on the screen!
function mouseClicked() {
// Save canvas as an image when a key is pressed
saveCanvas("generative_art", "png");
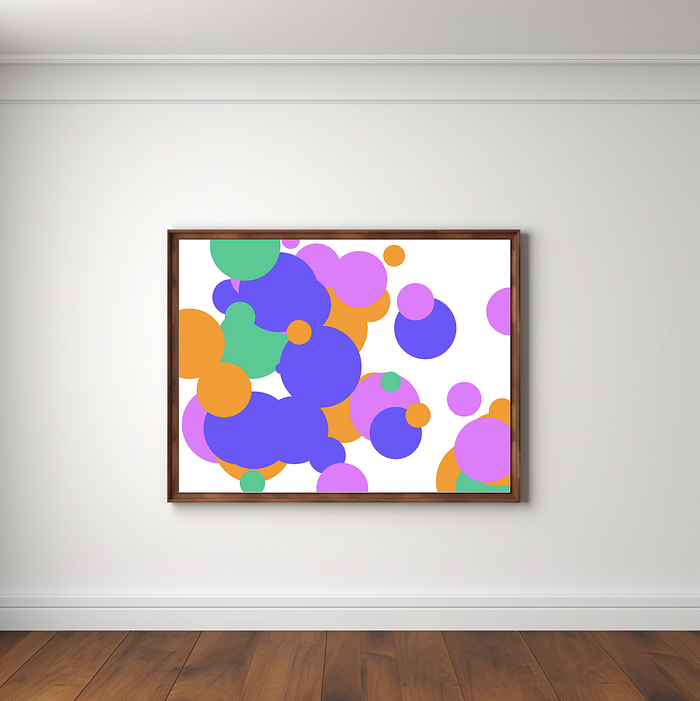
}I would encourage you to customize this and play around with everything that’s possible in p5.js (check out their incredible examples here!). I thought it would be fun to add in some extra code to put our artwork inside a gallery frame.
I used Midjourney to generate an art museum scene (learn how to use Midjourney if you haven’t already), then with some time contained it inside the frame on the wall.
Here’s a link to my Repl if you want to check it out my final code:
Preparing the NFT Assets with Pinata
Now that our art is ready to be an NFT, we need to upload it to IPFS using Pinata. To download our html file, simply click on the “index.html” tab and click “download.”

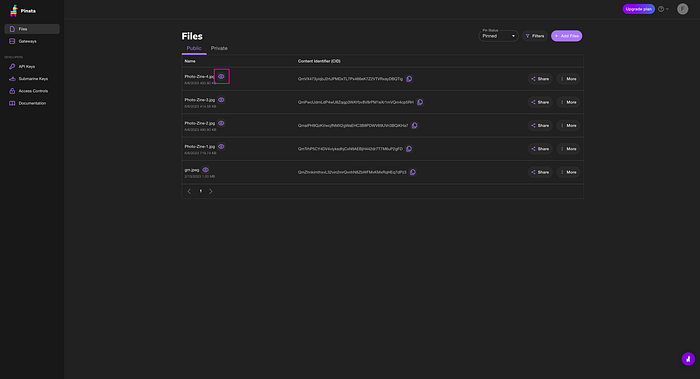
After downloading the file, either sign into app.pinata.cloud or create an account. Once you’re signed in, you’ll want to click on “Add Files” in the top right, select your index.html file, and click upload.

Now you can preview the file by click on the “eye” icon. When you view it, go ahead and save the URL for that file.
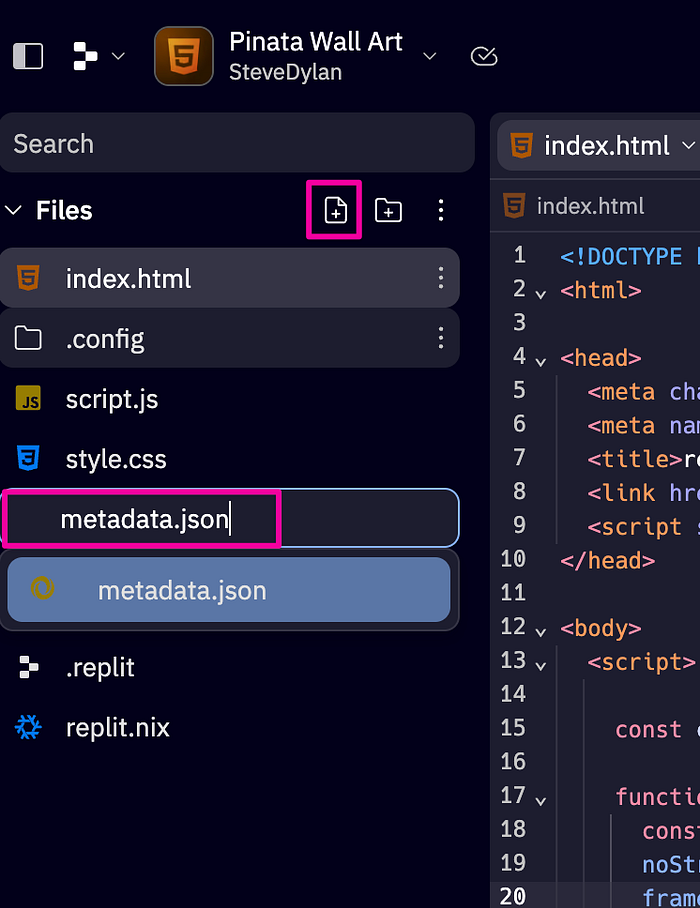
Now we have our html on IPFS, but in order to make it an NFT we need to link it to a JSON file and then put that file on IPFS too. Thankfully this is pretty easy. Just go back to Replit and create a new file in your existing project called “metadata.json.”
You can paste in this template JSON into the file, but be sure to replace it with your own info. Something I did here is upload a cover image to Pinata as well for the instances where a marketplace needs a thumbnail, then I referenced it with the same url pattern.
{
    "name": "Pinata Generative Art",
    "description": "A generative NFT using P5.js",
    "external_url": "https://pinata.cloud",
    "image": "https://discordpinnie.mypinata.cloud/ipfs/QmXkNCDY3tt8AEG5VaDpeT7g8metXswAhW4pRZTAnuDgxQ",
    "animation_url": "https://discordpinnie.mypinata.cloud/ipfs/QmNaDofq9w1SW92hVC645JvDvpJviAWDWB9MwQQi5Uu68x?filename=index.html"
}
After editing your JSON file, save it and download it to your computer, then upload it to Pinata like you already did with the html file. Once you upload it, copy the CID and save it for our next step.
Minting the NFT
There are a lot of ways to mint an NFT, but the key think you need is your metadata JSON file IPFS CID, which is usually called the “Token URI.” It’s the key to all the data about your NFT and without it, you would just have a bland token. You can reference your CID multiple ways and read more about that here, but this is how I’ll be putting it into our NFT:
ipfs://QmYLF8CkirmgNd8njUuZ4sQjfj9j8S31JH2482gaKocvUnTo mint our NFT we’ll use a combination of OpenZeppelin and Remix. It can be a little daunting your first time, but it’s actually pretty easy once you try it out.
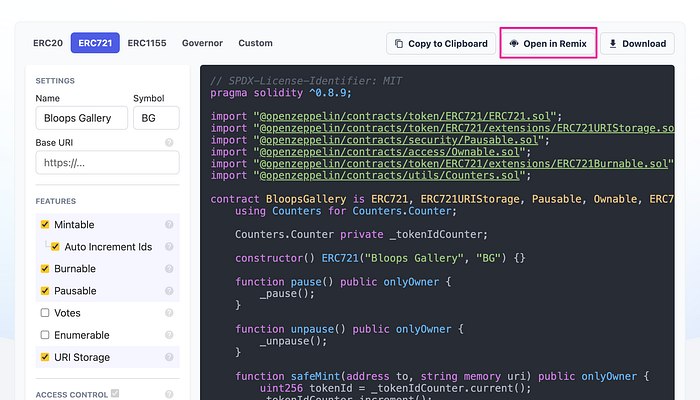
First you’ll want to visit the contracts page of OpenZeppelin. Scroll down and you’ll see a code editor which can build simple smart contract.

Next select the ERC721 template at the top, and give your NFT a name and symbol. Be sure to leave the Base URI blank for this example.

There are a lot of options that you can use for your smart contract and I would recommend doing that if you want to deploy your NFT to a mainnet.
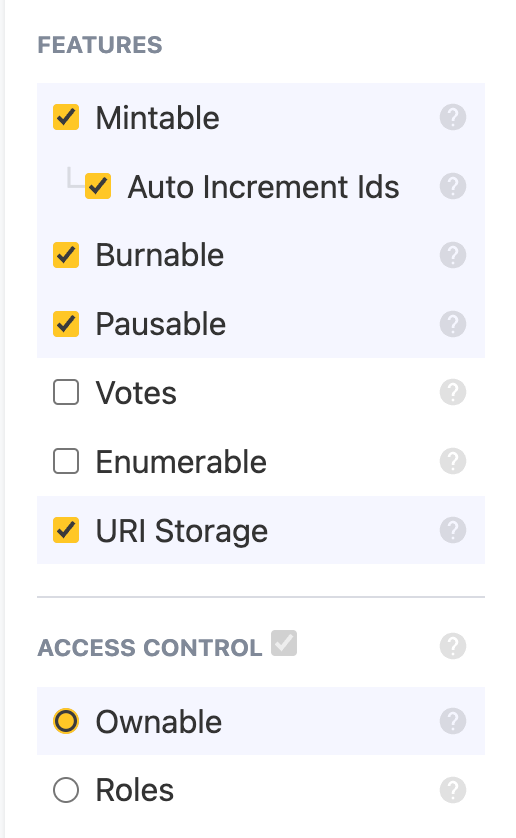
For this tutorial on a testnet, you can select the following:
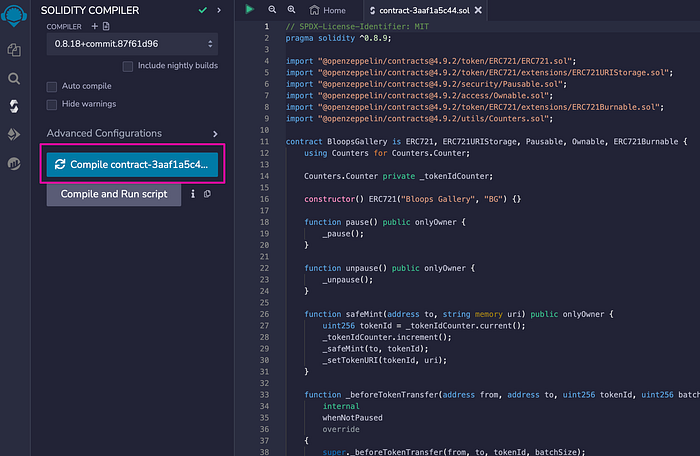
After making those changes you’ll see your smart contract and it’s ready to go. Click on the “Open in Remix” button on the top which will take us to a special smart contract IDE.
You’ll be taken into the editor, and it should show a compile button on the right side which you will want to click.
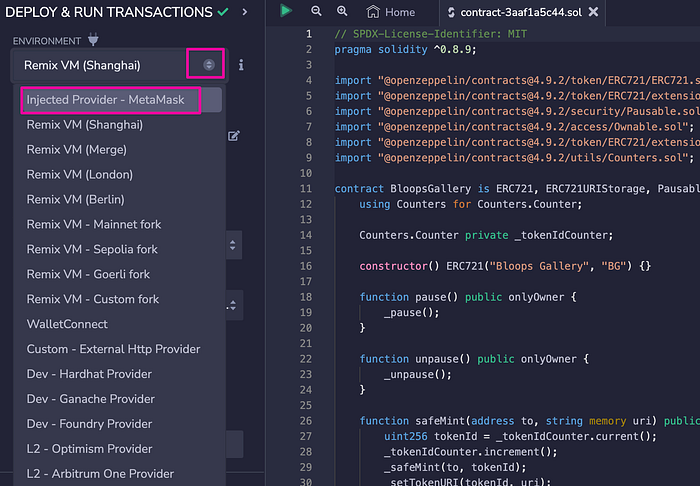
After compiling, the compiler icon will have a green check signaling it was successful, and now we can deploy it. To do that, select the “Deploy and Run Transaction” icon on the right.

One thing you will want to do before deploying it preparing your crypto wallet with some testnet funds.
At the writing of this blog, I would recommend Sepolia and the Sepolia Faucet by Alchemy. After you have collected some testnet funds, click on the “Environment” button and select “Injected — Metamask.” You should then be prompted to connect your wallet.
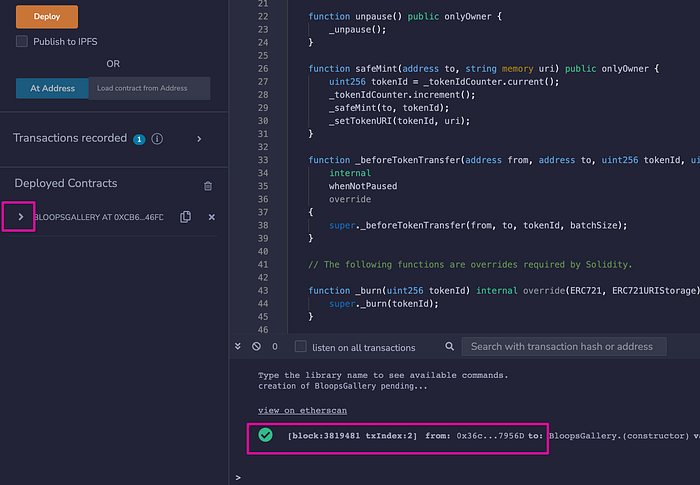
After everything is hooked up you can click the “Deploy” button, and then you will be prompted to sign the transaction from your wallet.

If successful you will have a transaction at the bottom and a new contract under “Deployed Contracts,” and you will want to expand that.
We’re almost there, now it’s time to mint the NFT using the safeMint function. You will see it takes an address, and a “string uri.”
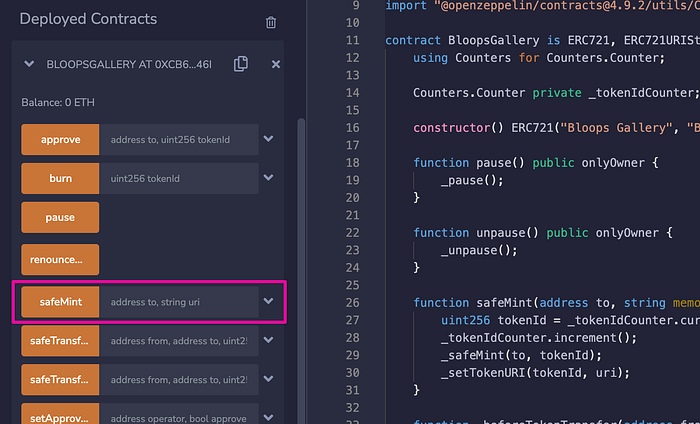
The “uri” is the Token URI that we spoke of earlier, aka the CID for the metadata JSON file for our NFT. You will want to paste both the address you want the NFT minted to, and that URI. It should look something like this:
0x2Fd0BD0d1c846682F3730cB3F6c22052B43495A9,ipfs://QmfWuYAQJsuBGHxj39sv8u4QS9t3u57qNtymL3CVB1aUiWOnce you have that information in, just hit the safeMint button and you will be prompted to sign another transaction. After it’s approved, in a few minutes you should be able to visit testnets.opensea.io and connect the wallet you minted to and see the NFT.
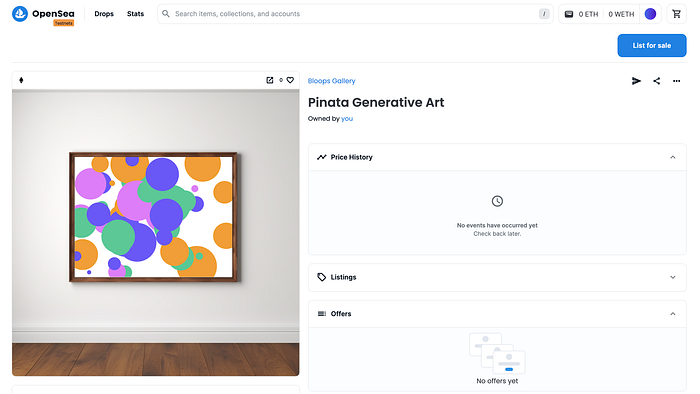
Here’s a link to mine: https://testnets.opensea.io/assets/sepolia/0x57da31708c33d3dea1a3fa161a91bedb4452a892/0
That’s it! You just minted a generative art NFT, and it’s only the surface of what’s possible with p5.js and Pinata. We can’t wait to see what you’ll create!

